

Making Black Cat Cake Pops
I first fell in love with these little treats on a stick when I spotted them at my local coffee shop and had to purchase one. They where the right size for a sweet treat, but the price of these little cake pops made me want to learn how to make them for myself and to use at family parties during the holidays,birthday parties or other special occasions when my family need to bring a treat.These cute little black cat cake pops are a fun Halloween treat that you can make for your child's Halloween party at school or an office party.
The fun part is in decorating the cake balls to look like black cats, but for a twist on this cake pop you could use orange,light chocolate or white candy melt color and make different colored cats for a fun treat any time of the year. You could make them for your child's birthday party. On this page you'll find my personal instructions,tips and the items that I use to making these cat cake pops. Some of these tips that I discovered are not in any of the cake pop books, but ones that I found help me when I tried to make these tasty little treats in my own kitchen.

What You"ll Need to Make The Cake Balls For the Cat Cake Pops:
These Cat Cake Pops for Halloween are so cute with their candy eyes and ears. This recipe make 48 little cake pop Cats. You just start with the basic recipe for making any cake pop.Lists of Items:
- 1 store bought cake mix ( I used a chocolate cake mix from Betty Crocker for my cats, but you can use any type of cake you like for your pops)
- 9 x 13 inch pan.
- 1 12 oz Can of cake frosting, any flavor. This is where you can experiment with different cake and frosting combinations. ( I used Whipped chocolate frosting also from Betty Crocker for my little black cat heads.)
- Wax paper
- 2 Cookie Baking sheets
- Plastic wrap
- Large mixing bowl and metal spoon
- A book on How to make Cake pops ( I used Cake Pops Tips, Tricks and Recipes etc by Bakerella)
- Start with baking the cake per the instructions on the package for a 9 x 13 inch pan, Let the cake cool completely(my tip: bake the cake a day before your are going to make these pops to make sure that it is really cooled. I found that the cake was easier to crumble, when I let it cool over night.
- Cut the cake into four equal pieces,then crumble one section of cake at a time into a large mixing bowl making sure you don't have any large pieces.
- Add the whole can of frosting. ( I found that if you mix in about 1/2 cups at a time it make this step easier.) Mix it into the crumbled cake using the back of a large metal spoon or spatula, until the frosting is mixed into the cake. (Tip: You don't want to much frosting or it will be to moist and the cake balls will not hold together.)
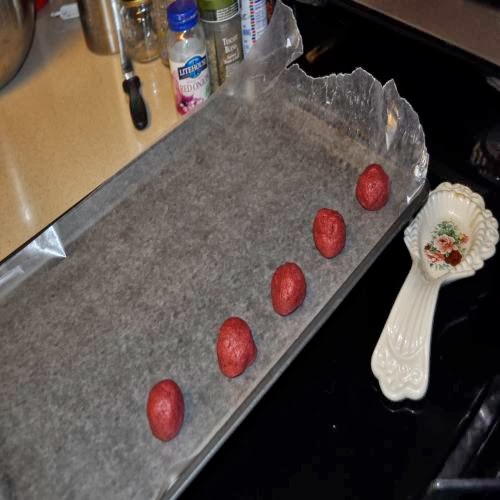
Roll the cake into 48 1 1/2 inch balls first, then place them on to a baking sheets covered with wax paper. Cover with plastic wrap and chill for at least 3 hours. (Tip: I found that this seems to be the right amount of time for the cake balls to firm up, so that you can dip them. You can use a special cake ball tool found at any baking store or purchase one on Amazon.
Have the cake balls chilled and sitting on the baking sheets in the refrigerator while you are getting ready to melt the candy coating and setting up all the items you'll need to decorate your Cats.
What You'll Need to Dip the Cat Cake Pops:
List of items for Dipping:
- 3 bags of Candy melts about 30 ounces ( I used black candy melts for my cats)
- A double boiler( Many of the site tell you to microwave your candy melt, but I found that when I use a double boiler my candy stayed warm and it was easier to dip the cake pops without them breaking. I also used less candy melts.)
- 48 paper Lollipop sticks
- Styrofoam block or something to hold cake pops after dipping

1. Melt candy coating in a double boiler (about 10- 20 ounces at a time) according to the instructions on the package. Make sure that the coating is about 3 inches deep, this make it easier to dip the shapes in the coating.( Tip: I found that I less of the candy melts when I used my double boiler and didn't have to keep reheating the candy. If you don't have a double boiler, then use the microwave to melt the candy in a glass bowl. After the candy is melted place the bowl into a hot water bath. You can make this by using a deep cake pan and pouring boiling water into it, then set your bowl into the hot water.)
2. Next remove a few cake shapes when you are ready to dip them. You only want to take a few at a time out to dip them. (Tip: I found that removing about 6 at a time works perfect. That way the rest of them stay chilled.)
3. Dip the stick about a 1/2 inch into the melted coating and insert it into the pointed tip of the triangle shape about half way through.Next use the toothpick to apply some of the melted candy onto the other two tips and attach two chocolate chips for ears. Allow them to harden for a few seconds.
4. Next dip the whole cake pop into the melted coating. You submerge the whole cake pop with one dunk. Remove cake pop and gentle tap off any extra candy coating. (Tips: This step can be a bit tricky at times and take some getting use to, but I found that if you don't coat the whole cake pop, then turn it right side up and tap the cake pop, allowing some of the coating to run down and cover the rest of the pop and twirl it to wrap around the stick.)
5. Place the stick into the Styrofoam block and allow the pops to dry.

Items Used to Decorate Cat Cake Pops:
When the cake pops are dry or you can touch then without smearing the candy coating. You can start adding the eyes,ears and nose. Here is a list of items that I used to make my cats, along with some other options that you can use.
List of Items for Decorating Your Cats:
1. 96 Yellow Smarties for the eyes. ( options for eyes are white or yellow oval sprinkles)
2. One tube of black Candy writer for the center of the eyes.
3. 48 round pink sprinkles for the nose( or all orange or red rainbow chip sprinkles )
4. 96 chocolate chips for the ears
Instructions for Making the Cats:
Use the toothpick and dip it into the melted candy coating, then apply two small dot of the melted candy in the spot where you want the eyes. Attach the candy eyes and hold for a few seconds. Next apply dots for the chocolate chips ears and nose using the same technique as the eyes. To finish the eyes, I use Duff Goldman's black candy writer that you melt in hot water, then applied a small amount in a dot on each yellow candy eye.
I hope you have as much fun making and eating these cute cat cakepops as my family did. My daughter took these to a friends party and them loved them. All the items used to make these cake pops can be purchased at either Amazon or Michaels.

No comments:
Post a Comment